On this page
Before you start
You need three things: the product in your catalog, a connection to the marketplace, and a category mapping for it. Fields that should follow your own product data are linked on the tab itself, see Link Main Tab fields to your PIM tab.
Click "Validation" in the left sidebar and pick the tile of the marketplace you are listing on. Read the Validation screen explains what the cards show.
Steps
Click "Add missing PIM tabs" on a card whose red count is above zero. The "PIM tabs" wizard opens, so you can create the tab for every product in that category in one go. At a red count of zero the button greys out, because there is nothing left to create.
Fill the mandatory fields of the orange products on the product's own marketplace tab, or leave them to "Fill mandatory fields & validate" in the next step.
Click "Validate products" and pick the option you need. "Fill mandatory fields & validate" first lets e-tailize fill the mandatory fields it can and then validates, which is what the orange products need. "Validate only" validates the tabs you completed yourself, the yellow ones, and touches no field.
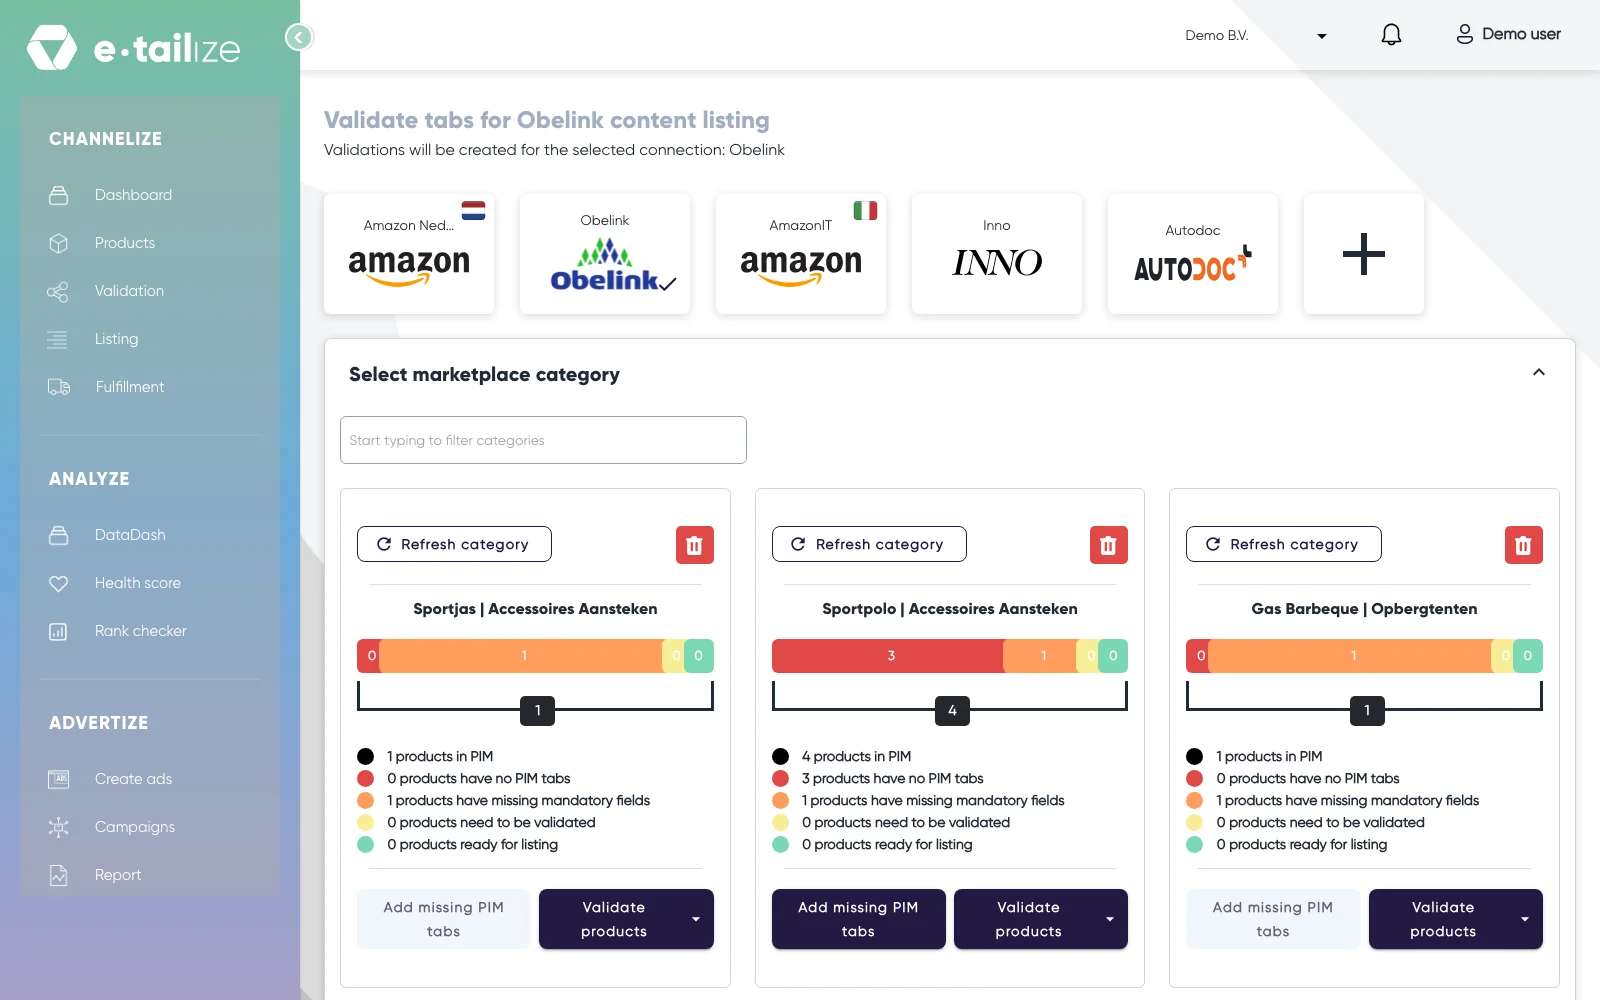
The "Validate products" button on a category card, next to "Add missing PIM tabs" Wait for "Please wait while we validate and map your products" to finish. The result is either "Nearly there!" with the number of points that still need work, or "Congratulations!. You successfully completed your mapping". Everything that passed moves to the green count.
Fill in the blocking fields when the run rejects products. The page opens "Resolve mapping fields errors" with those products and exactly the fields that stop them, each with an "Add the value here" input. Click "Continue mapping" at the bottom right: your values are checked against the marketplace's field types and the validation run continues on its own.
Click "Refresh category" when the validation keeps flagging a field you cannot find on the tab. It fetches the marketplace's current fields for that category, so you can fill in the new ones and validate again.
Click "Listing" in the left sidebar and pick the same marketplace tile.
Select your validated products and click "List content". Content is the product page itself: name, description, images and the attributes from the tab.
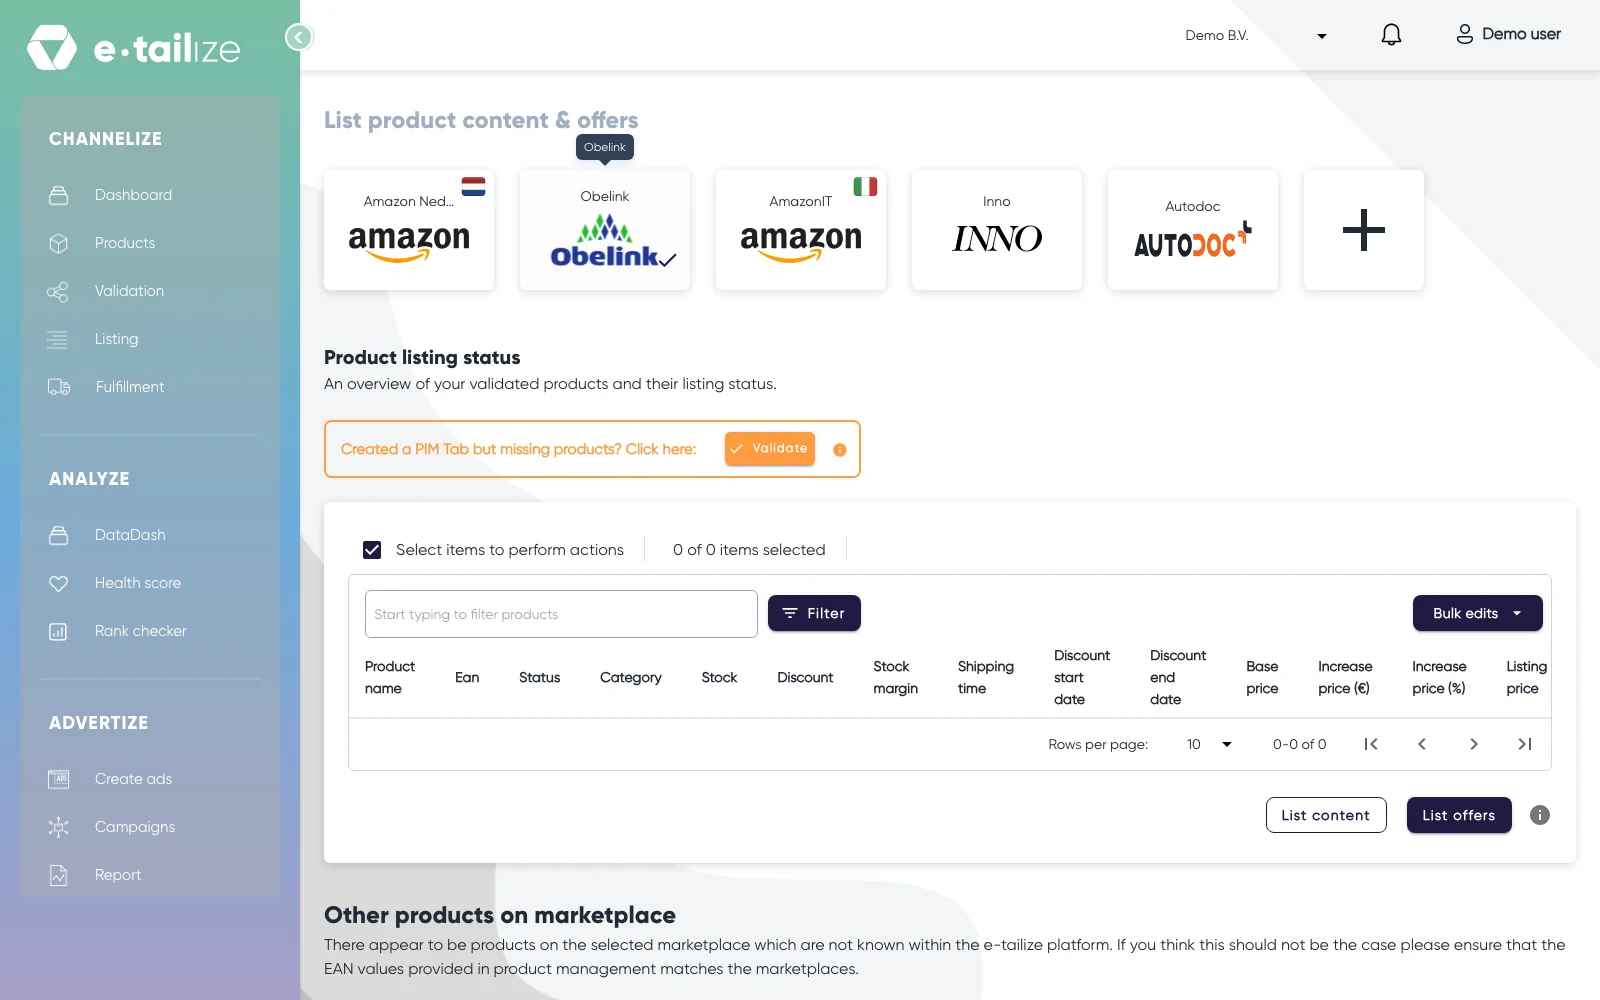
The product table under "Product listing status", with the "List content" and "List offers" buttons Click "List offers" once the content is through. The offer is the commercial part: listing price, stock, delivery promise and fulfilment method. Content always goes first, because on bol an offer has nothing to attach itself to while the content is still being processed. The marketplace processes and approves that content itself, so "List offers" can come back with "product does not exist" while the approval is still running. That is a waiting status, see Fix validation and listing errors.
What happens next
The status dot next to the marketplace on your products page follows the same four states: "No PIM tab" (red), "Missing mandatory fields" (orange), "Pending validation" (yellow) and "Validated" (green). Each state in the "Listing status" filter is its own checkbox, so you can tick several at once, and the tab header shows the number of ticked states behind "Listing status". A product appears in the listing grid once it is validated, and its "Status" column reads "Listed" once it is live.
Common problems
Click a list button with nothing ticked and you get "Please select items to update", so select your products first. When a run comes back with problems from the marketplace, they appear above the grid per product, with the field that was refused. Fix validation and listing errors covers the ones you meet most.
FAQ
Why does "List offers" come back with "product does not exist"?
That is a waiting status. The marketplace processes and approves the content itself, so the offer has nothing to attach itself to while that approval is still running. Wait, then run "List offers" again, see Fix validation and listing errors.
Why is "Add missing PIM tabs" greyed out on a card?
Because the red count of that card is zero, so there is nothing left to create. The button only opens the "PIM tabs" wizard for a card whose red count is above zero.
What is the difference between "List content" and "List offers"?
"List content" sends the product page itself: name, description, images and the attributes from the tab. "List offers" sends the commercial part: listing price, stock, delivery promise and fulfilment method. Content always goes first.
Was this useful?