On this page
Before you start
Shopify hands out its credentials through an app you create yourself in your store, so you need admin access to that store and permission to create and install apps. Legacy apps are no longer allowed, so build a new one through the current app development flow even if you had one before.
Steps
In Shopify, open "Sales channels", click "Sales channel settings", open "Apps", click "Develop apps" and then "Build apps in Dev Dashboard".
Click "Create app", give it a name such as e-tailize, and click "Create".
Open the app configuration and enable these scopes:
write_draft_orders     read_draft_orders
write_inventory        read_inventory
write_locations        read_locations
read_marketing_events
write_order_edits      read_order_edits
write_orders           read_orders
write_price_rules      read_price_rules
write_product_feeds    read_product_feeds
write_product_listings read_product_listings
write_products         read_products
write_purchase_options read_purchase_options
write_shipping         read_shipping
write_third_party_fulfillment_orders
read_third_party_fulfillment_orders
Click "Release" and confirm it.
Open the app, click "Install app", pick the store and click "Install".
Copy the client id and reveal and copy the client secret under the app's "Overview" or "Settings".
Copy your store domain under "Sales channels", "Sales channel settings" and "Domains". It is the active domain in the shape
https://yourstore.myshopify.com/.In e-tailize, open "Settings", click "Connections", click "New connection" on the "API connections" page and pick "CMS".
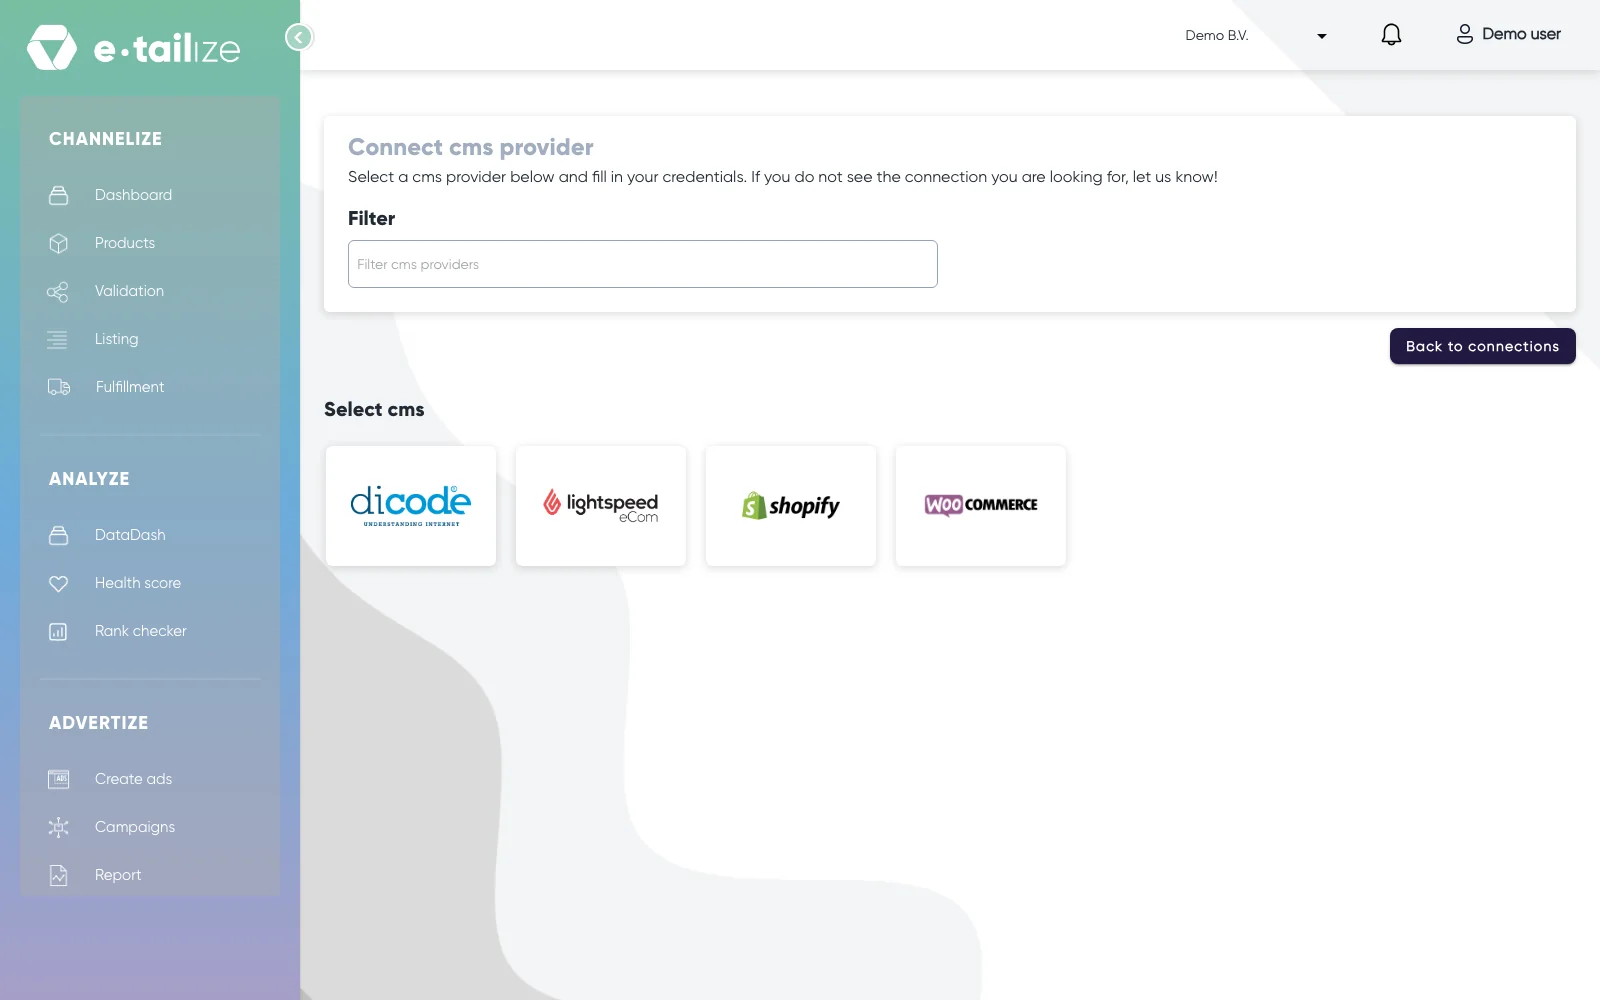
The page "Connect cms provider" with the logos of Dicode, Lightspeed, Shopify and WooCommerce under "Select cms" Click the Shopify logo, name the connection and fill in the store url and the two values you copied. Shopify's app dashboard calls them the client id and the client secret, the fields in e-tailize carry their older names, "Api key" and "Admin api access token".
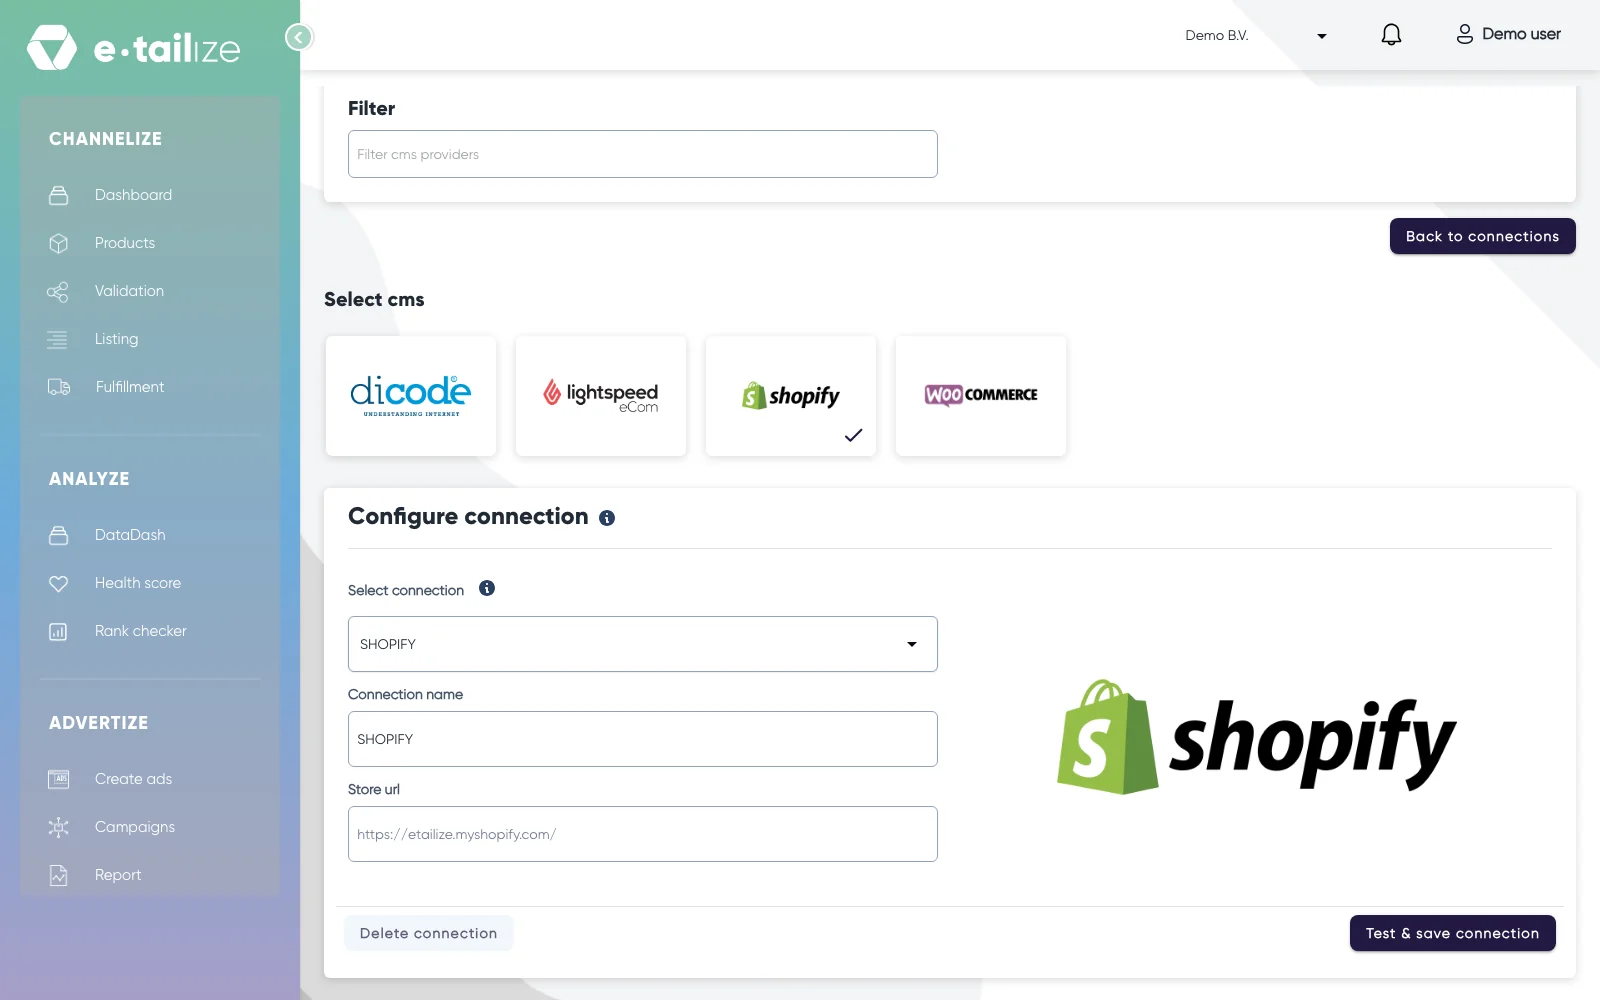
The block "Configure connection" with "Select connection", "Connection name", "Store url" and the button "Test & save connection" Click "Test & save connection". A working connection answers with "Connection test passed and saved successfully!".
What happens next
The connection is what your product import runs on, and it keeps stock moving both ways: from Shopify into e-tailize and back again, and on to the marketplaces you forward stock to.
Two things decide whether that works. e-tailize reads the EAN from the barcode field of your Shopify products, for stock, orders, track and trace and the import itself. And the stock it uses is the total across all your Shopify locations, not one location.
Common problems
The test names the problem in the message it gives back.
"Please provide a valid .myshopify.com store url"
The store url you filled in is not a .myshopify.com address.
"An existing connection has already been made to this store, please specify a different url or use the existing one"
There is already a connection to this store. Use that one instead of adding a second.
"Invalid Shopify connection details. Please refer to instructions on how to connect to your store"
The two credentials are wrong or were regenerated, or the app is not released and installed on the store you are connecting.
"Password is required" under "Admin api access token"
The field takes no password. Fill in the "Admin api access token" from your app.
FAQ
Can I reuse the app I made years ago?
No. Legacy apps are no longer accepted by Shopify, so create a new app through Shopify's current app development flow and connect it with fresh credentials.
Does e-tailize write back to Shopify?
Stock does, both ways: from Shopify into the e-tailize PIM and from the PIM back to Shopify. Track and trace is kept up to date on Shopify too. Product content is the exception. Pushing content from e-tailize back to your shop is not supported, so the "Export products" button has no effect. Enriched your content in e-tailize? Ask support.
Was this useful?